Aug
28
2010
--

Fresh Herbs, Take Two

Feeling a little blue that the summer season will be ending soon? And that with the end of the season your fresh herbs might be nearing their last few harvests? Me too.

I simply love the taste of mint and basil in our salads. And there is no way that a change in season will keep us from enjoying them! Wondering how to extend the life of your fresh herbs all throughout the year? Fear not, I have some tips to help you savor them and even share them with friends and family as gifts.

What type of herb are you drying?

Before choosing a method of preservation for your fresh herbs, consider the sturdiness of the herb itself. Tender leaves, such as basil, dill, parsley and mint, are better suited to freezing. But wait, do not just throw them in the freezer, they will turn brown! To prevent them from turning brown and to better capture the flavor, try blanching them first. Take the bunch of herbs, tied together, and drop into boiling water for several seconds, no more. You do not want to cook them. Then with a slotted spoon or tongs, transfer them to a bowl of ice water to chill for several seconds to stop the cooking process. Blot dry them with paper towels or in a salad spinner. Remove the leaves from their stems and spread them in a single layer within plastic storage bags and freeze. Blanched herbs can be frozen for up to four months and can be chopped in their frozen state before being added to soups, stews and sauces. Blanching and freezing herbs was not a method I had thought to try previously, but it can produce more flavorful results for your more tender herbs than simply hanging them to dry.

Reserve air drying for hardier leaves, such as rosemary, thyme, sage, lavender and oregano.

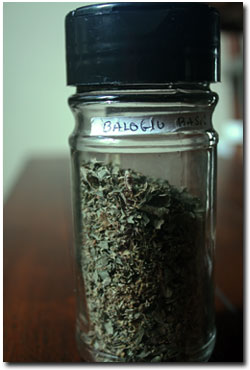
Begin by wrapping a piece of kitchen twine around the stems, creating a loop. Hang the bunch, upside down, in a cool, dry place until they are brittle to the touch, usually four to ten days. Worried about dust while they are suspended in your kitchen? Try enclosing the bunches in a paper bag with enough holes punched in it to keep air flowing. Once they are dry, pick leaves from stems, and place them a tightly sealed air-tight jar. Create your own labels, and don’t forget to date them! Store the dried herbs in a cool, dark place. They should keep for 6 months to a year. They even make great gifts. We often save old spice jars, remove the labels and re-purpose them. You can buy new spice bottles though from a container or kitchen store quite easily and cheaply. It’s sure cheaper and a more creative gift than buying dried herbs!

Other ideas
I did also come across some additional methods for drying herbs in tulle. Tulle is the thin fabric used in sewing projects, or more commonly in veils. To do this, first wash and rinse the herbs and pat them dry. Then arrange the herbs on 18 to 24 inch squares of the tulle. Then loosely roll into tubes, do not bundle them tightly. Loosely tie the ends with kitchen twine and place them in the refrigerator for about two weeks. Once they are dry you can package them just the same as mentioned above, by removing them from the stems and placing them into storage containers.

Another neat trick that I learned recently from the Queen of all things domestic, Martha Stewart, was how to take those frozen basil leaves and create frozen basil and olive oil ice cubes. The cubes are perfect for reusing later for pesto or dips without having to thaw a large batch. Simply take some of the blanched and frozen basil leaves you created previously and place them in a blender or food processor. Tip: using the blanched leaves will ensure you don’t end up with brown cubes. Cover the leaves with extra-virgin olive oil and puree. Pour the mixture into ice cube trays, filling each cube about 2/3 full. This should be about a tablespoon. Place the tray in the freezer. Once solid, remove the cubes from the tray and place into a plastic freezer bag. That’s it, now you can take one or as many cubes as you need from the freezer all throughout the next season and enjoy the fresh basil and olive oil mixture.

Share and Enjoy!

So there you have it. You don’t have to stop enjoying your fresh herbs just because the season ends. You can enjoy herbs during the fall and winter by preserving your summer herb plants. You’ll not only add a fresh pop of flavor to your soups and sauces — you’ll also save money and create some one of a kind gifts!

Written by in: Uncategorized |
Jul
20
2010
--

With a Cherry on Top

Growing up in Montana, one of my favorite tastes of summer was always fresh cherries from Flathead Lake. I remember having a huge flat of cherries in the house in the summertime. Their firm but juicy flesh and sweet taste were like no other fruit I had tasted. The only drawback was the pit, I used to hate having to deal with the cherry pits. I still do. Perhaps that is why it was so exciting when my mom sent us a cherry and olive pitter last year. Now we can throw back cherries and olives with ease!

I as looking at the calendar today and realized that cherry season is here, actually it is almost over, and it got me to thinking about the different types of cherries. And better yet, what else do I not yet know about this delicious fruit?

cherry picking

Out of My Cherry Pickn' Mind, The Domestic Nest

There are two main types of cultivated cherries, wild cherry, to which most cherry cultivators belong, and the sour cherry. Sour cherries are mostly used in cooking, although the Greek culture does enjoy a certain sour cherry drink. Both species have origins in Europe and western Asia. The two types cannot be cross pollinated, meaning that you will not be seeing a wild sour cherry combination, at least in the natural world, very soon. Cherries are not a cheap treat. This is mostly due to the fact that they are a labor intensive fruit. Irrigation, spraying, labor and their vulnerability to damage from rain and hail also make cherries expensive. Cherries, especially wild cherries, remain extremely popular, so demand is never an issue.

Cherries have a very short growing season. The peak season for cherries in North America is in June. In many parts of North America they are among the first tree fruits to ripen. In the United States, most sweet cherries are grown in Washington, California, Oregon, and Northern Michigan.

Cherries are not only tasty, they also contain health benefits. Cherries contain anthocyanins, the same red pigment in berries. Besides giving them their color, anthocyanins also act as powerful antioxidants. According to a 2008 study funded by the Cherry Marketing Institute, rats that received whole tart cherry powder mixed into a high-fat diet did not gain as much weight or build up as much body fat, and their blood showed much lower levels of inflammation indicators that have been linked to heart disease and diabetes. In addition, they had significantly lower blood levels of cholesterol and triglycerides than the other rats. Studies like this one present some interesting findings, but the jury is still out on whether or not the same results are valid for humans. In the meantime I will enjoy my cherries knowing that eating 5-7 servings of fruits and veggies each day has a huge health benefit no matter what additional studies are still pending.

Well known sweet cherry types include “Bing”, “Brooks”, “Tulare”, “King” and “Rainier”. The Lambert variety is grown on the eastern side of Flathead Lake in northwestern Montana. I can personally attest to the tasty quality of the Lambert sweet cherries, yum. Both Oregon and Michigan provide light-colored “Royal Ann” or “Queen Anne” cherries for the maraschino cherry process. Most sour cherries are grown in Michigan, followed by Utah, New York, and Washington. Sour cherries include Nanking and Evans Cherry.

The sour cherry is a favorite in my family. Both for its use in baking as well as the Greek “Vyssinatha” or sour cherry drink. This Greek “medicine” is a family favorite and often used to cure upset stomachs, particularly after a large meal. It is easily made by adding sour cherries to a jar with a few simple ingredients and let it sit out in the sun for 40 days.

So there you have it, everything you wanted to know about cherries in order to enjoy them this season. Cherries are enjoyed best plain but as they start to ripen there are many great recipes to put them to further use. Enjoy!

Written by in: Uncategorized |
Jul
14
2010
--

Strawberry Dreaming

strawberries

Nutrition packed strawberries

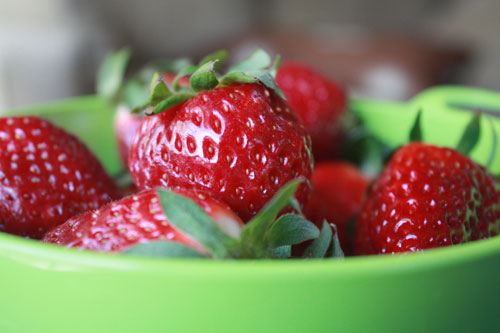
One of my favorite things about this time of year is strawberry season. Did you know strawberries have vitamin C, fiber, iron, calcium and protein? That is one power packed fruit! And they taste so good. Biting into a fresh strawberry from the garden is like biting into a taste of spring. (ok, I realize it is now summertime but you get the idea!)

There is nothing like the sweet, juicy taste of a ripe strawberry. And there is nothing more disappointing than the crunchy bland taste of the white inside of an unripe and out of season strawberry. That is why late spring and early summer are the prime time to enjoy this seasonal treat. And if you buy them in bulk you can create homemade ice creams and jams in no time and enjoy them for weeks and months to come.

When buying strawberries, you want to look for strawberries that are bright red (with no white or green around the stem), fragrant, and plump, with no soft spots. And when wondering whether to go organic, the safe rule of thumb is to choose organic when you will be eating the skin of the fruit, such as in the case of the strawberry.

And here is a must know tip: if you are going to be enjoying them right away, it is best not to refrigerate them. To store them, lay the berries flat on a paper-towel-lined plate or in a plastic container and refrigerate for up to 2-5 days. The paper towel will help to absorb the moisture created. Do not rinse or hull them until ready to use.

Another great trick for enjoying strawberries throughout the year is to freeze them. I have found this method for freezing them particularly helpful when making smoothies. As the frozen fruit actually yields a more milkshake like quality of the smoothie. Simply wash and drain the strawberries in a colander. Then place them on a parchment paper lined cookie sheet, with just a little bit of space between the berries. Place the trays in the freezer overnight. The next morning, remove the trays and transfer the berries to a freezer safe bag or container. This way the berries are not stuck together and you can place them in serving size bags as well to make your life even that much easier.

So the next time you pass a roadside fruit stand displaying a sign for fresh strawberries, or you pass by some at your local farmers market, make the stop for this tasty spring treat. Not only do they taste good and have countless recipe options, these little power packed treats are incredibly good for you. Some recent studies have shown a link between eating foods such as strawberries, which contain anthocyanins, and preventing heart disease and inhibiting tumor growth. I could go on and on about the health benefits, but the real persuasion is in the taste. Try some fresh, juicy strawberries and you will not be disappointed!

Other strawberry tips or favorite recipes anyone?

Written by in: Uncategorized |
Jul
02
2010
--

Happy 4th of July!

Red, White and Blueberry!

Ok, I know it is totally lame to link to last year’s 4th of July post, but that is how busy my life has been these days! And plus when something is good, it’s worth eating twice right? Click here for last year’s Red, White and Blueberry Dessert.

Wishing everyone a happy and safe 4th of July holiday this weekend!

Written by in: Uncategorized |
Jun
27
2010
4

Welcome Miss Daphne!

Daphne

Our new sweet girl

Ok, so it has been too long since my last post but once again I have a great excuse. Not only have I been loving my new job and our new life in North County, we also welcomed into our lives a new family member, of the four legged kind. Miss Daphne joined us last week.

New friends

New friends

She is a King Charles Cavalier Spaniel. She is 6 and a half years old and is the sweetest little girl. But do not let that sweetness fool you, she actually has become top dog around our home; little Miss Hayley follows her all around. They have been getting along great, although Daphne has more interest in food than she does in playing with energetic young Hayley. Daphne’s family was moving and could not take her with them. And although I am sure she misses them she seems to have adjusted quickly and quite happily to her new home. We are so happy to have Daphne’s sweetness and calm demeanor in our home and Miss Hayley is loving having a friend around while Steve and I are at work all day.

Please join us in welcoming Daphne! Wondering how life is with 2 dogs now? Great, but I am sure I will have twice as many stories to share!

Written by in: Uncategorized |
May
03
2010
2

May Flowers Bring Thoughts of Spring

Beautiful May Flowers, Orange and Blue Contrasts Captured My Attention!

Beautiful May Flowers, Orange and Blue Contrasts Captured My Attention!

Hello everyone! I know I have taken a long break from posting any news. But I have good reason! So far 2010 has brought all kinds of good change. Kind of like how after the cold of winter and the rains of spring, flowers begin to thrive. Well, so has our life lately. In the last month we have moved into our first home (as first time homeowners!), which also meant we relocated to North County San Diego and after months of unemployment I am now employed!

We are still settling in to the new place. And since I am now working full-time, there really has not been enough time to write about the whole home buying experience. But now that things are starting to calm down a bit, I am thrilled to have a few minutes to write again and think creatively. More to come on our home journey.

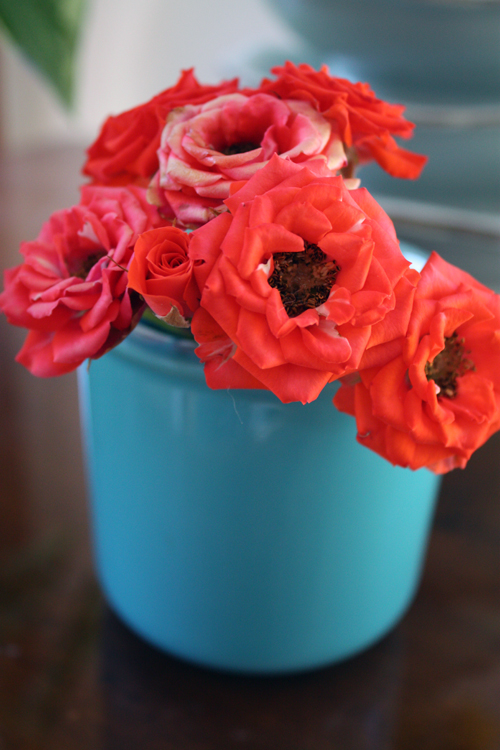
This past weekend we celebrated Mother’s Day early with my mom. I took the above photo of one of the many adorable vases filled with fresh blooms that could be found all over my brother and sister-in-law’s house. These particular little roses in this blue vase captured my attention from across the room and I just couldn’t resist taking their photo.

Stay tuned for more house photos as we unpack! Happy Spring everyone!

Written by in: Uncategorized |
Mar
22
2010
2

Apron Giveaway at Happy Find

Apron Giveaway at Happy Find

Apron Giveaway at Happy Find

Have I told you that I am slightly apron obsessed? The talented Venus and team at Happy Find are giving away one beautiful piece of art, a hand-made apron to one lucky blog reader. I am not kidding when I say that these are quite simply the most finely crafted aprons, and stylish too. Simply visit the post here and follow the instructions to enter the giveaway. May the best hostess win!

pincushions

cute pincushions

And the fun doesn’t end there! Happy Find also has a fabulous sale going on right now at their Etsy store as well, visit the store here to browse their creative hand-made goods.

Written by in: Uncategorized |
Mar
20
2010
1

Help Us Win A Free Canvas Print

Hayley's Sweet Stare

Hayley's Sweet Stare

Hayley needs your vote again today in the Canvas Press Pet Photo Contest! You can vote once every 24 hour period until midnight on 3/24. Help us win a free canvas print, she needs 40-50 votes today to get into the top 3, take a minute to help her win! Vote here.

Written by in: Uncategorized |
Mar
19
2010
--

Irish Carbomb Cupcakes, An Extra Sweet St. Pat’s Day

Guiness and Bailey Irish Carbomb Cupcakes

Guiness and Bailey Irish Carbomb Cupcakes

Well friends I am thrilled to share with you that not only did I get the corned beef right this year, I also tried a new cupcake recipe that was so yummy I could not believe how easy it was. These cupcakes have Guinness in the cake batter, Bailey’s in the chocolate ganache center and Bailey’s and Kaulua in the frosting. YUM!! To save time you could omit the ganache, but who wants to miss out on that yummy chocolaty center, not me!

Here is the recipe from IrishCentral.com, with a couple of my tweaks. Enjoy!

Ingredients

Serving: 12 cupcakes

1/2 cup stout (Guinness)
1 stick, 8 tbsp., unsalted butter
1/4 plus 1/8 cup unsweetened cocoa powder
1 cup all-purpose flour
1 cup sugar
1/2 plus 1/4 tsp. baking soda
1/4 plus 1/8 tsp. salt
1 large egg
1/3 plus 1/6 cup Greek Yogurt or sour cream

For the Baileys ganache filling:

4 oz. (60-70% cocoa) dark chocolate, finely chopped
1/3 cup heavy cream
1 tbsp. butter, at room temperature
1 tsp. Baileys Irish cream

For the Baileys butter cream frosting:

1/2 stick, 4 tbsp., unsalted butter, at room temperature
2-3 cups confectioners’ sugar, sifted
2-3 tbsp. Bailey’s Irish cream
2 tbsp Kahlua Liquor

Preparation

To make the cupcakes, preheat the oven to 350° F. Line two cupcake pans with paper liners. Combine the stout and butter in a medium saucepan over medium heat. Add the cocoa powder and whisk until smooth. Remove from the heat and allow to cool slightly.

In a large mixing bowl, combine the flour, sugar, baking soda and salt. In the bowl of an electric mixer fitted with the paddle attachment, beat together the eggs and Greek yogurt to blend.

Add the stout-butter mixture slowly and beat just to combine. (Allison’s Note: if the stout mixture is still warm you don’t want to cook the egg, so add it in a little at a time) Mix in the dry ingredients on low speed just until incorporated. Divide the batter evenly between the cupcake liners, filling them about 2/3 full. Bake until a toothpick inserted in the center comes out clean, about 17 minutes. Allow to cool in the pan for 5-10 minutes, then transfer to a wire rack to cool completely.

To make the ganache filling, place the chocolate in a heatproof bowl. Heat the cream in a small saucepan until simmering, then pour it over the chocolate. Let sit for one minute and then whisk until smooth. If the chocolate is not completely melted, place the bowl over a double boiler or give it a very short burst in the microwave (15-20 seconds). Add the butter and Baileys and stir until combined. (Allison’s Note: you can do this step as a double boiler, simply place the chocolate in a heat proof bowl over top a small saucepan filled 1/3 full with water, add the cream and heat until chocolate is melted, then add butter and Baileys and stir; remove from heat). Set aside to let the ganache cool until it is thick enough to be piped. (You can use the refrigerator to speed the cooling process, but be sure to stir every 10 minutes or so to ensure even cooling.)

Meanwhile, cut out a portion from the center of the cupcake using the cone method (a small paring knife works best for this). Once the ganache has reached the correct consistency, transfer it to a piping bag fitted with a wide tip and pipe it into the cupcakes. (Allison’s Note: you can also dip the tops of the cupcakes into the ganache just before it cools completely and allow the ganache to harden on the top of the cupcake before piping the frosting)

To make the frosting, place the butter in the bowl of a stand mixer fitted with the paddle attachment. Beat on medium-high speed until light and fluffy, about 2-3 minutes. Gradually add the powdered sugar until it is all incorporated. Mix in the Baileys and Kahlua until smooth. Add more if necessary until the frosting has reached a good consistency for piping or spreading. Frost the cupcakes as desired.

This recipe is from the wonderful food website Annie’s Eats/ IrishCentral.com
Written by in: Uncategorized |
Mar
17
2010
--

Happy St. Pat’s Day! And 1 year of Allison Cafe!

shamrockA Drinking Song
by William Butler Yeats
Wine comes in at the mouth
And love comes in at the eye;
That’s all we shall know for truth
Before we grow old and die.
I lift the glass to my mouth,
I look at you, and I sigh.

May you all feel lucky today, I know I do! Today is one of my favorite holidays. It also happens to be the one year anniversary of starting my blog, Allison Cafe. So happy anniversary too! In honor of the day we will be feasting on corned beef and cabbage and homemade Irish Soda Bread this evening.Oh, and maybe a Guinness or two as well!

St. Patrick’s Day Fun Facts

  • Saint Patrick was a priest. He was born to wealthy parents in Britain and his birth name was Maewyn Succat. He took Patrick as his Christian saint name when he became a priest. As a priest he spent his days teaching the Christian faith in Ireland. After his death, the country decided to honor him with day of his own – Saint Patrick’s Day.
  • Saint Patrick’s Day was originally celebrated as a religious holiday. It started as a simple feast day to honor St. Patrick but developed into a holy day of obligation where people attended mass in the morning and celebrate for the rest of the day in the afternoon. And gave Catholics a one day reprieve from lenten fasting, leading to a tradition of indulging in beer!
  • Corned beef and cabbage is a traditional Easter Sunday dinner in Ireland. But today it is a St. Patrick’s Day must for us in America!
  • Irish Society of Boston organized what was not only the first Saint Patrick’s Day Parade in the U.S. colonies but the first recorded Saint Patrick’s Day Parade in the world on 17 March 1737.
  • Originally the color associated with St. Patrick was blue not green. But green won out over the years – obviously!
  • Shamrocks, three-leaved plants, were thought to have been encouraged to explain the Holy Trinity to the pre-Christian Irish. Saint Patrick was known to have used them in his teachings. Wearing and displaying shamrocks and shamrock-inspired designs have become a ubiquitous feature of the day.
  • Cheers in Irish Gaelic is “Sláinte”, which means ” to your health”. In the South and West of Ireland it is pronounced “slawnt-yeh” or “slant-yeh”, in the North it’s “slain-cheh”, with the “ay” much broader than in the English “slain”.
Written by in: Uncategorized |

Powered by WordPress | Theme: Aeros 2.0 by TheBuckmaker.com